The following blog entry will help you configure your Android device mail app settings.
1) Select Mail App
![]()
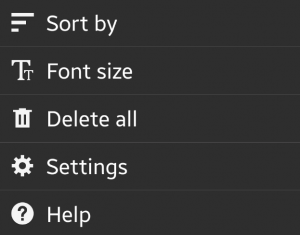
2) Click Menu
3) Select Settings
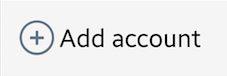
4) Click Add account
5) Enter Email address and Password
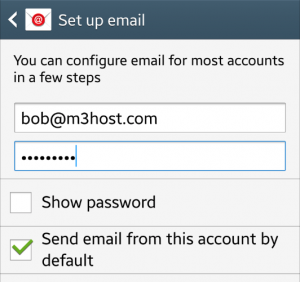
6) Click Next
![]()
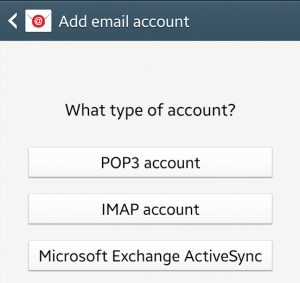
7) Select IMAP account type.
INCOMING SERVER SETTINGS
8) Enter Username and Password
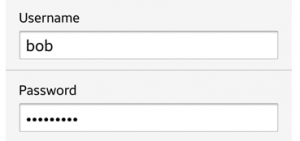
Note: Both are case sensitive
8) IMAP server
Incorrect: imap.domain.com
Correct: domain.com
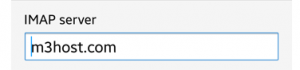
Note: You may need to use your server name (example v5000.m3xs.net)
9) Security type select SSL

10)Port 993
Note: you do not need an IMAP path prefix
11) Click Next
![]()
OUTGOING SERVER SETTINGS
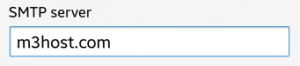
12) SMTP server
Incorrect: smtp.domain.com
Correct: domain.com
13) Security type SSL
14) Port 465

15) Check the Require sign-in box
![]()
16) Enter Username and Password
17) Click Next
![]()
18) Set your Account Options & click Next
19) Give the account and Name and Click Done.